Managing Activation Codes in PostEngine for Desktop
In this article
Overview
Activation codes are property-specific and required to begin posting ads with PostEngine for your property. Once activated, you’ll be able to manage and switch between the properties associated with your activation codes.
Add an activation code
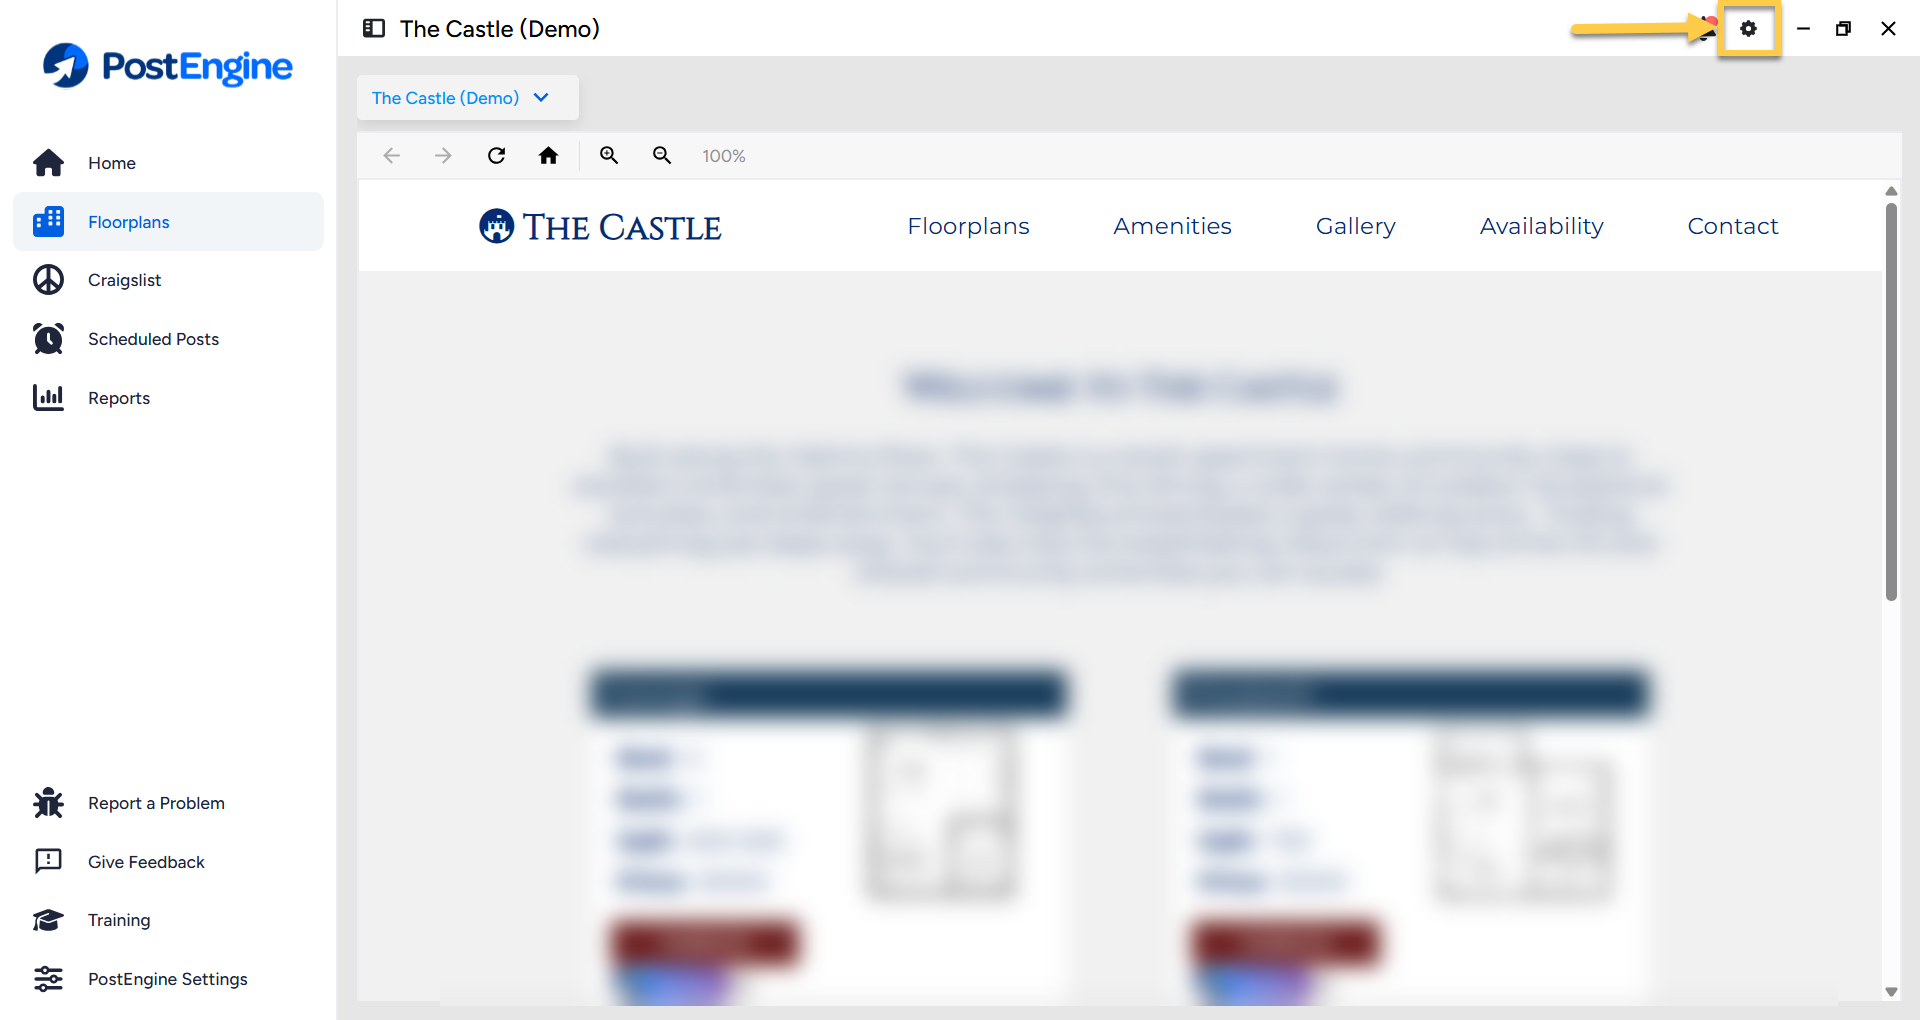
- Open PostEngine for Desktop.
-
Click the gear icon in the upper-right corner.
-
Click + Add Activation Code.
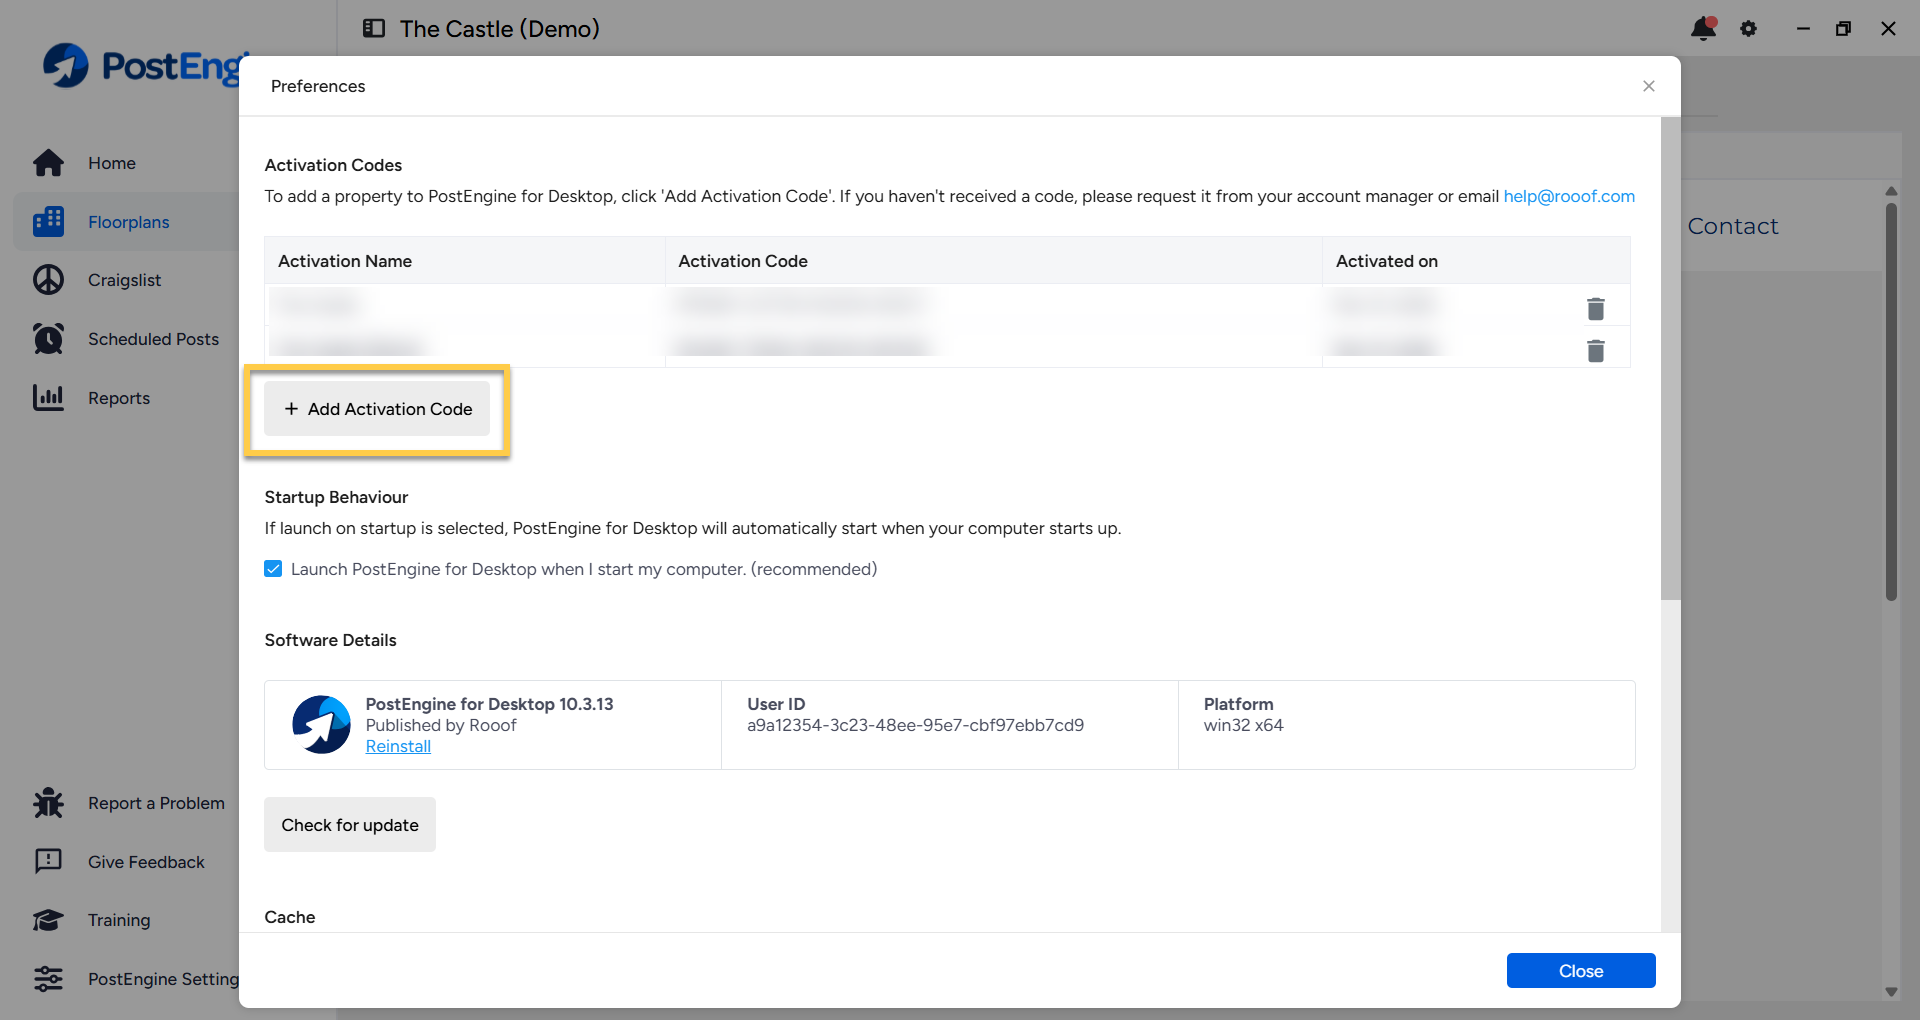


- Enter your activation code.
-
Click Activate.

-
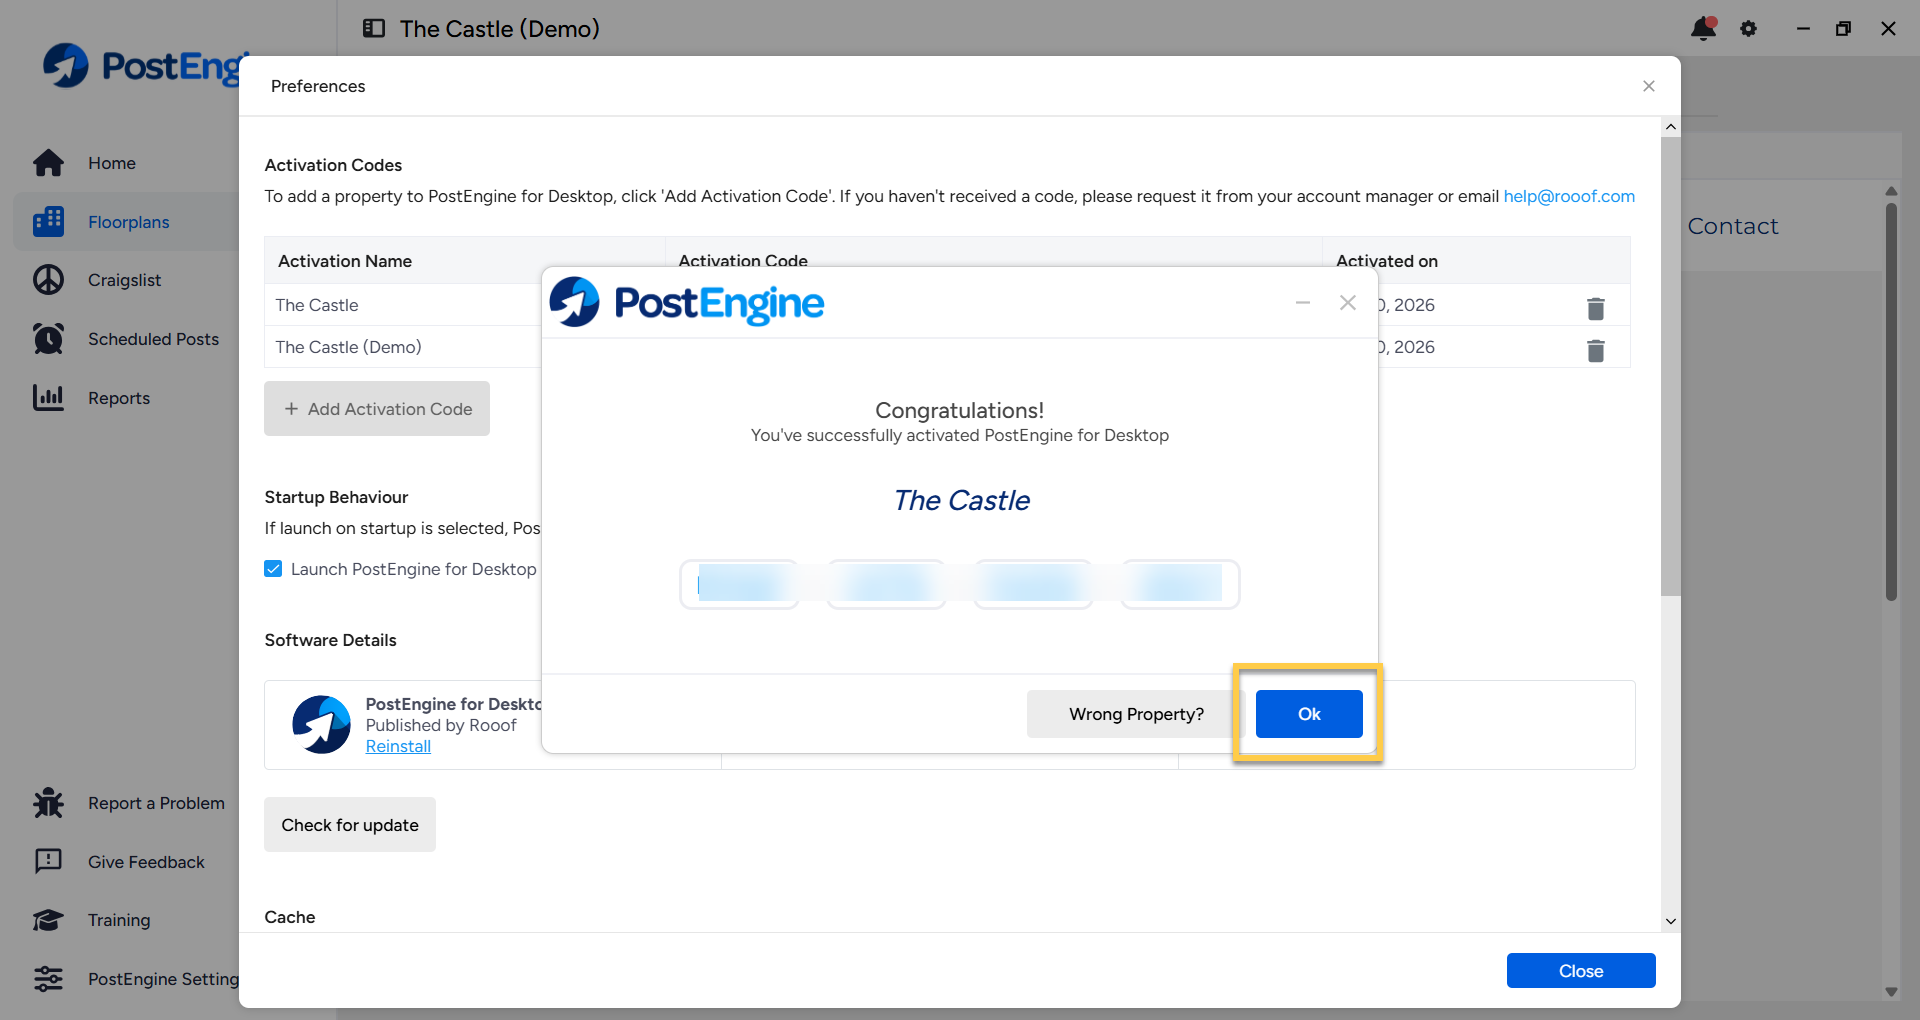
Congratulations, you've successfully activated! Click Ok.


You'll now see a list of the properties you're activated for. If you need to activate additional properties, repeat steps 2-5.
Posting for multiple properties
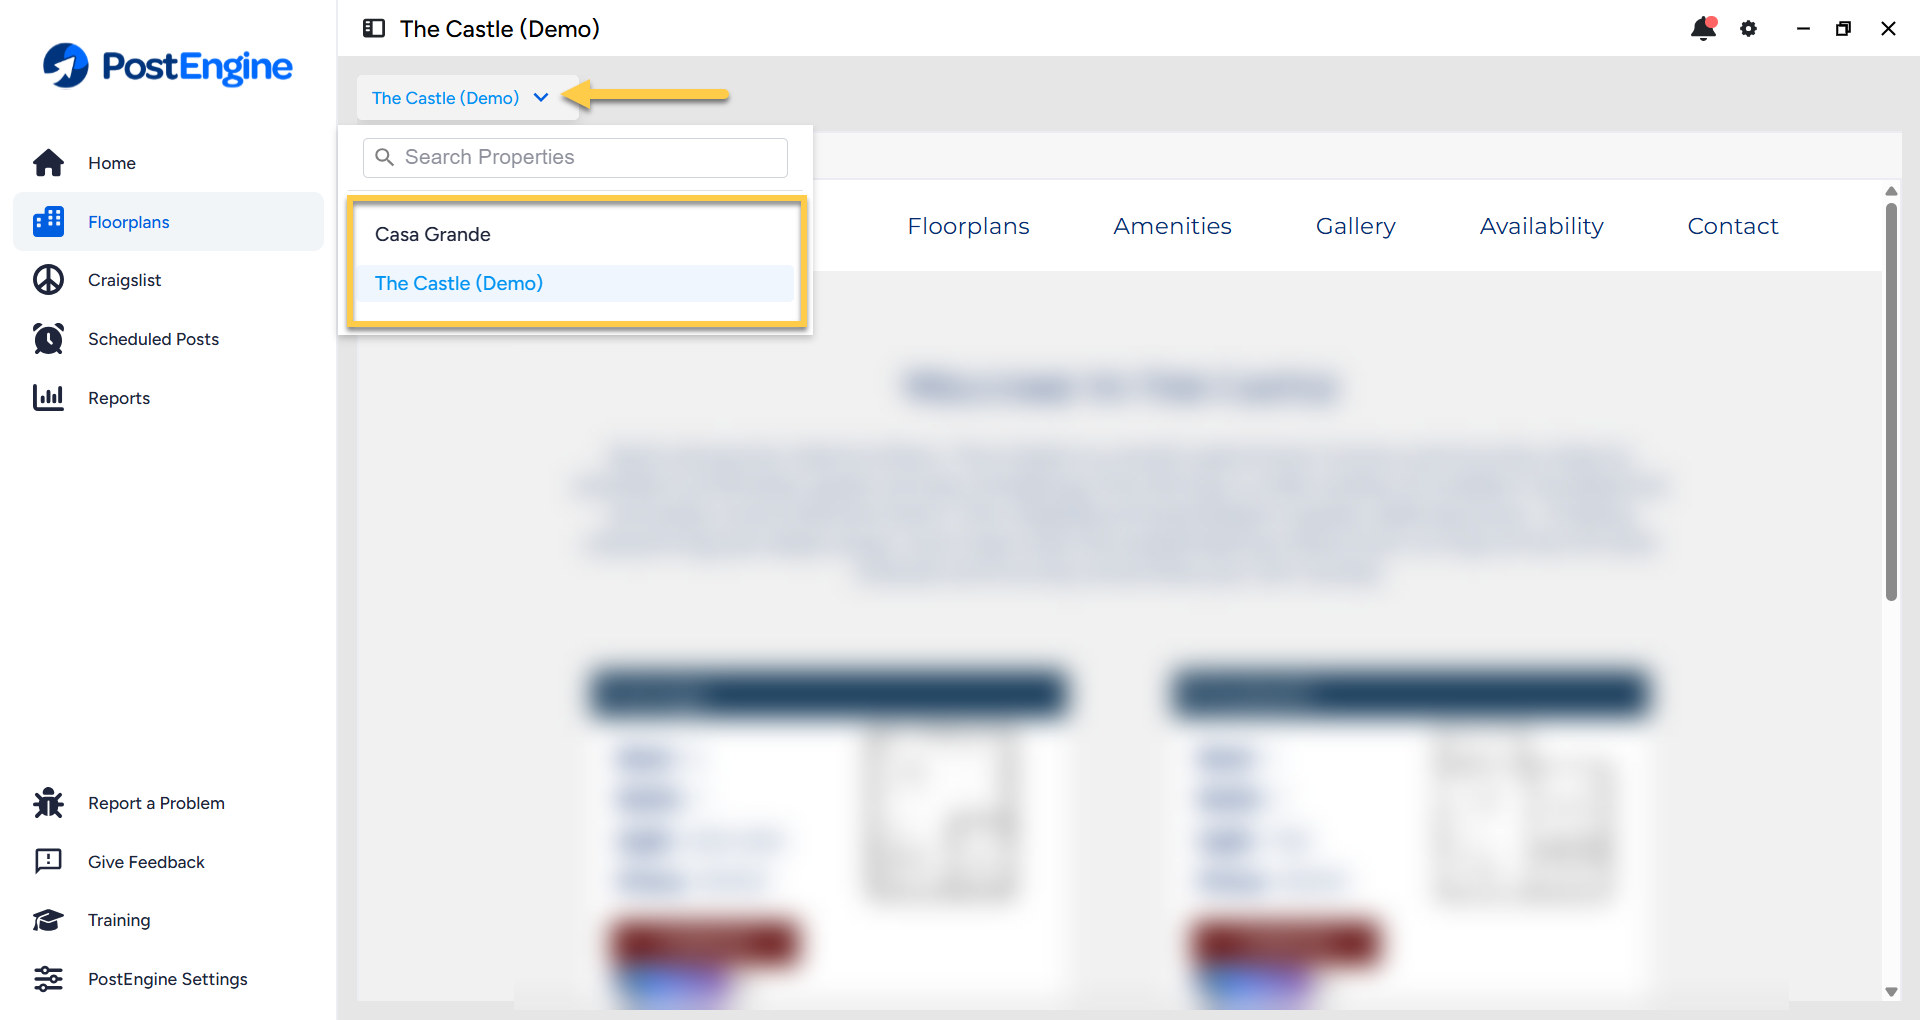
To switch between the properties you're activated for:
- Click on the arrow next to the property name to open the drop-down menu.
- Click to select the property you'd like to post for, or use the search bar.
-
The My Property page will update to the corresponding property website. Happy posting!

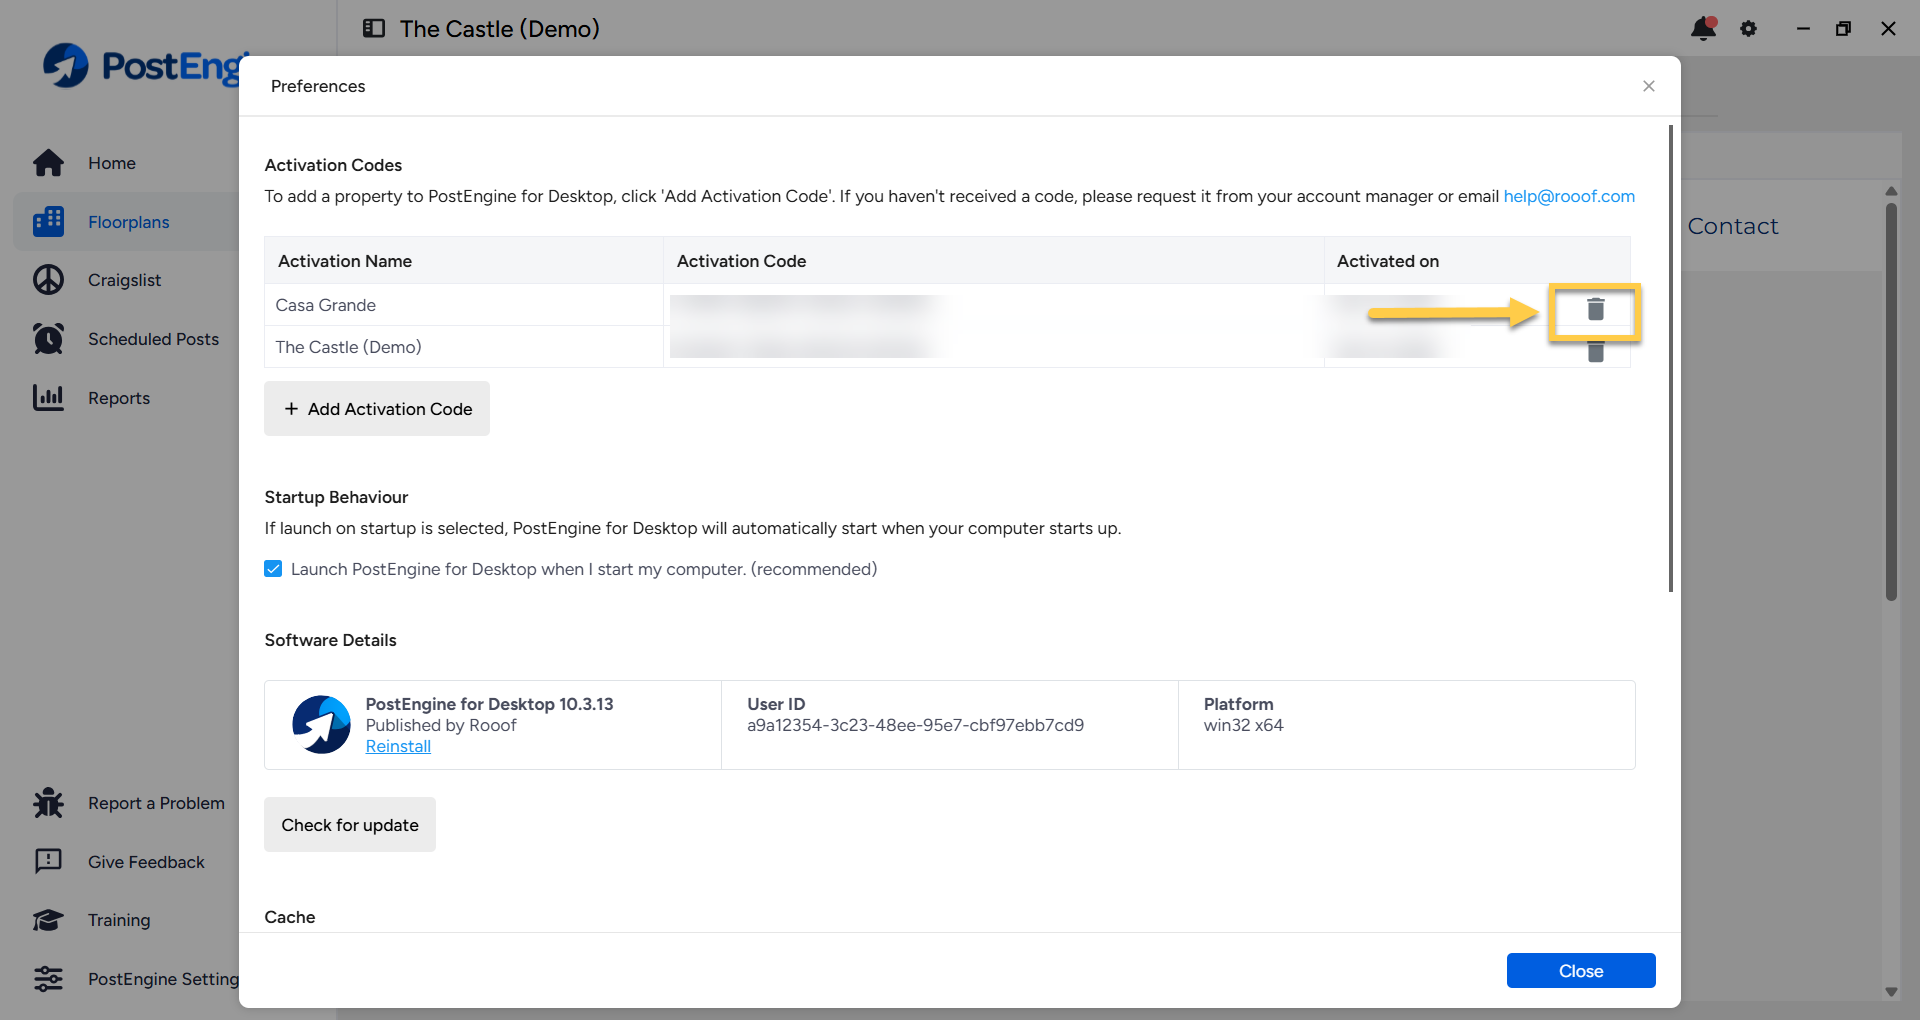
Remove an activation code
- Open PostEngine for Desktop.
-
Click the gear icon in the upper-right corner.
-
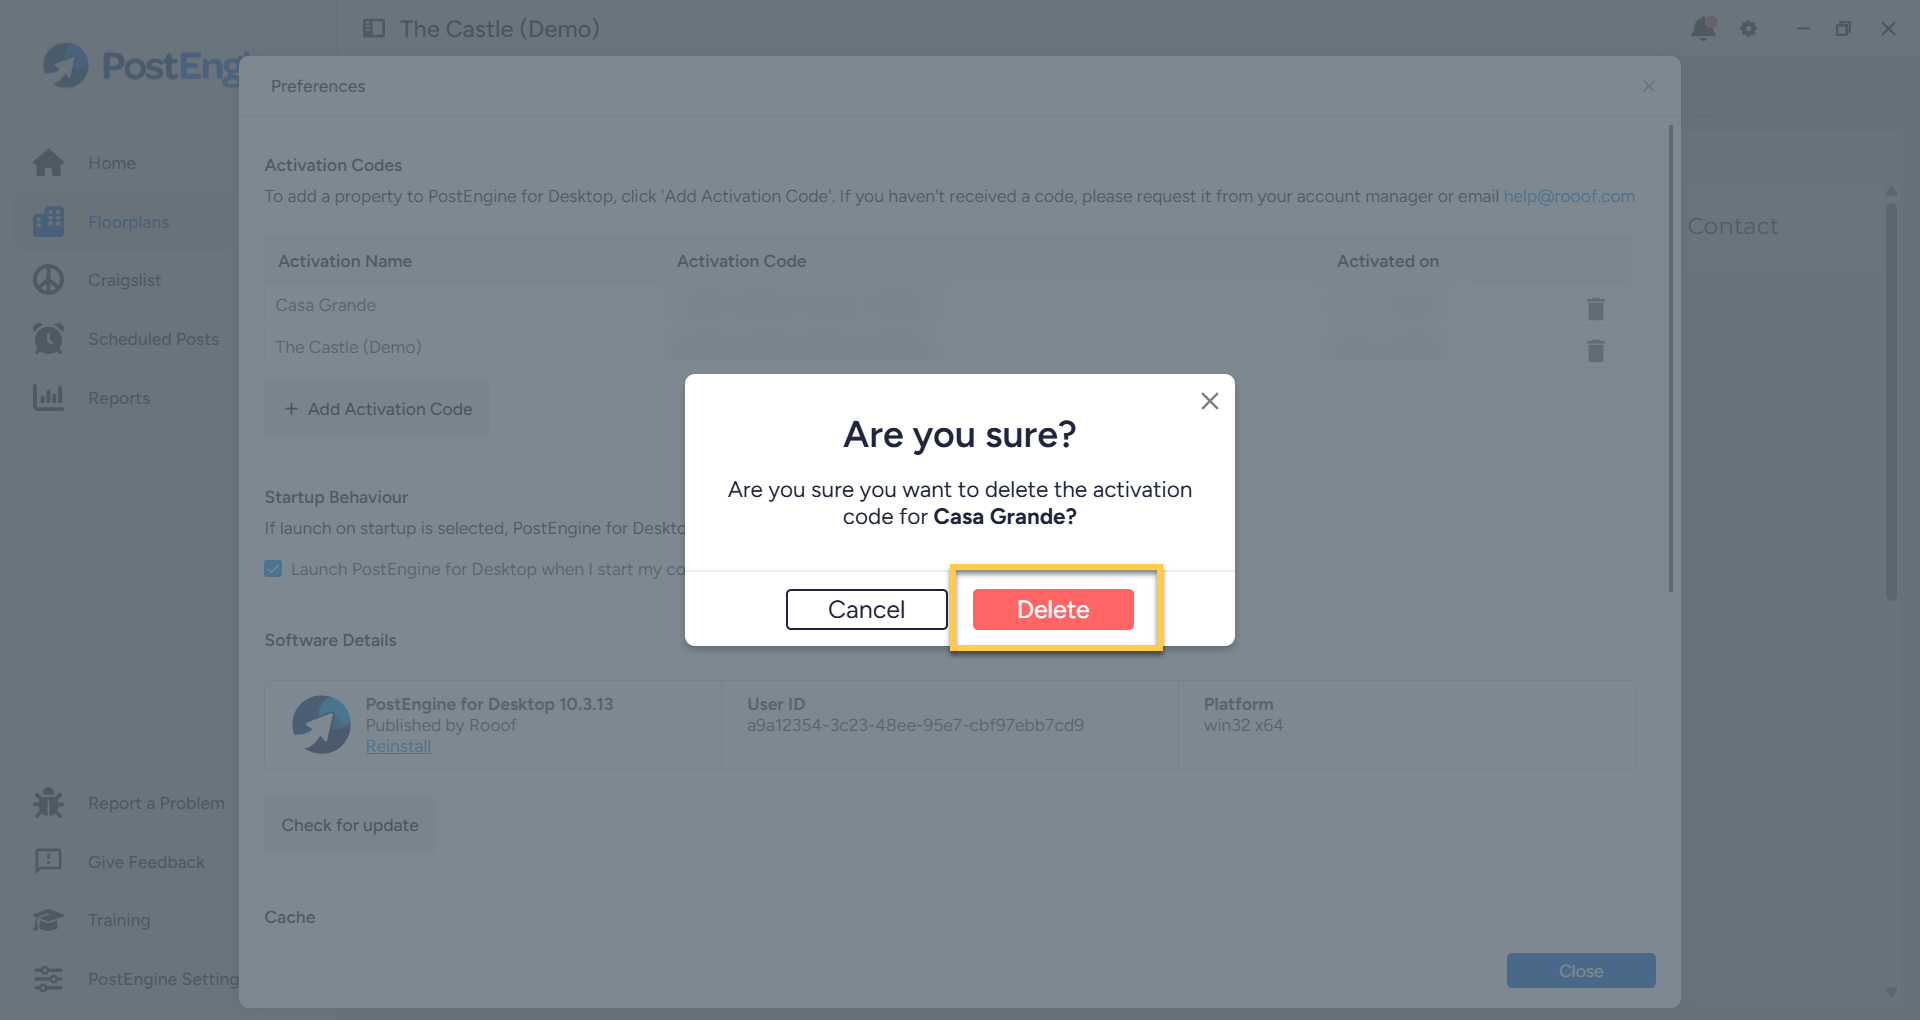
Click the trash can next to the code you'd like to remove.
-
You'll be prompted to confirm the removal. Click Delete to confirm. You're all done!


Troubleshooting
Why do I need an activation code?
Activation codes help ensure PostEngine functions correctly and allow us to accurately report activity for your property.
I don't have the activation code(s) I need.
You can request the code from the self-serve install page or by contacting our support team by emailing help@rooof.com.
I see an error message when I enter my activation code.
Please reach out to our support team by emailing help@rooof.com, we're happy to help troubleshoot!